
LANDU · Formulation & quality control
Switching Cement in Tile Adhesive: How to Revalidate HPMC and RDP Performance
A practical guide for tile adhesive manufacturers evaluating a new cement supplier or cement type.
 LANDU laboratorySample-testing workflow
Changing cement supplier or switching cement type can improve purchasing flexibility, availability or cost. For a tile adhesive manufacturer, however, the change also raises a formulation question: will the existing adhesive still deliver the same workability, open time and bond strength?
Keeping the same hydroxypropyl methylcellulose (HPMC) and redispersible polymer powder (RDP) does not guarantee an unchanged result. Equally, a cement change does not automatically require higher additive dosages.
Start by comparing the existing and proposed cements in an unchanged formula. Separate changes in water demand from changes in additive performance, then revalidate the finished adhesive before approving the switch.
The workflow below is a practical development and change-control plan for cementitious tile adhesives. It is not a replacement for the applicable test standards.
Use it to decide whether you can retain the current additive package, need a controlled HPMC or RDP trial, or need more cement-batch evidence before production approval.
1. Why the Same Cement Strength Class Is Not Enough
A cement strength class does not describe every characteristic that matters in a thin-layer tile adhesive.
Two cements can differ in constituent composition, fineness, particle-size distribution and early hydration behaviour. Sulfate availability also matters: research on tile adhesive mortars has specifically investigated how different calcium sulfate phases affect microstructure and performance.[1]
These differences can change the conditions in which cellulose ether and polymer powder function. Research evaluating cellulose ethers in tile adhesives also identifies interactions between cement, cellulose ether and latex powder as relevant to finished-mortar performance.[2]
For this reason, treat cement supplier changes, production-source changes and cement-type changes as separate events that require an appropriate comparison. A move between cement types may involve a broader binder change than switching suppliers within one specification.
Before making laboratory batches, collect the following information.
Swipe or use the arrow keys to view the complete table.
| Information to collect | How to use it |
|---|---|
| Full cement designation, constituent information and production source | Identify what has actually changed beyond the commercial name |
| Recent certificates of analysis, including available strength, setting and fineness data | Understand the supplier’s reported variation and select representative samples |
| Sulfate, alkali and additional composition information, where available | Support investigation of unexpected behaviour; avoid diagnosing from one number alone |
| Production date, delivery date and storage history | Identify whether ageing or moisture exposure could confound the comparison |
| Samples from the current and proposed supply | Enable direct testing in the same laboratory programme |
Record missing information explicitly. Do not substitute assumed chemistry for supplier data.
A cement certificate describes the supplied cement; it does not certify the performance of your finished tile adhesive. Define the adhesive’s required properties and internal acceptance criteria before comparing candidate materials.
2. Establish an Unchanged-Formula Baseline
The first experiment should answer one question:
What happens when only the cement changes?
Prepare a reference batch using the current cement and a comparison batch using the proposed cement. Keep the cement mass fraction unchanged and control:
- Sand and filler sources, grading and moisture condition.
- HPMC and RDP grades, dosages and raw-material lots.
- All other ingredients.
- Mixing-water source, temperature and addition.
- Mixing sequence, equipment, resting period and remixing.
- Tile and substrate preparation.
- Application, curing and testing conditions.

Use representative, properly stored cement. An old reference sample that has absorbed moisture is a weak basis for deciding whether the proposed supply performs better.
Run the reference alongside the candidate wherever practical. A same-day control helps identify changes in the laboratory or test materials that historical records may not reveal.
If the previous cement is unavailable, compare against documented historical performance and retained finished-product samples where suitable. Record the limitation: this is less conclusive than a direct raw-material comparison.
3. Separate Water-Demand Changes from Additive Effects
A cement change may alter the water needed to achieve the intended application consistency. If water is adjusted immediately without recording it, the investigation changes two variables at once.
Use two clearly labelled development comparisons.
Comparison A: Fixed water addition
Use the same water addition for both cement versions.
Express the addition on a clear basis, such as kilograms of water per 100 kilograms of total dry mix. Record cement and additive contents separately so water-to-dry-mix and water-to-cement ratios are not confused.
Record initial consistency, consistency retention, trowelling behaviour and fresh density where useful. This shows whether the cement change alters the existing product’s behaviour at its established mixing-water level.
Comparison B: Comparable application consistency
If the fixed-water mixes differ materially, run a second comparison using a defined consistency target.
Measure consistency using the same method, equipment, temperature and elapsed time after mixing. Record the water addition required by each formula. “Both feel workable” is insufficient for a reproducible comparison.
The extra water is part of the formulation result. It may affect subsequent adhesion and other properties, so it must remain visible in the trial record.
For classification testing, follow the applicable specimen-preparation and water-addition requirements. Do not improvise a different procedure to obtain a passing result. If the production recipe needs a revised mixing-water range, validate that range before changing customer instructions.
4. Revalidate HPMC Through Mortar Performance
The relevant question is whether the current HPMC still provides the required behaviour with the proposed cement.
Nominal solution viscosity alone cannot answer that question. It does not fully describe performance in a mortar containing cement, fillers, polymer powder and other ingredients. When comparing supplier viscosity values, also check that the measurement methods are comparable.

Assess the following properties together.
Water retention and consistency retention. Use a consistent test method and record behaviour over the intended working period. A change immediately after mixing may differ from the change observed later.
Tile transfer and open time. Examine contact after controlled delays between spreading the adhesive and placing the tile. Use these observations to support, rather than replace, the relevant adhesion-based open-time test.
Slip and application behaviour. Check whether the adhesive supports the intended tile application while still allowing adequate bedding and contact.
Setting and early strength development. Check whether the cement–cellulose ether combination changes the product’s usable working period or early performance.
Do not treat water retention as a complete proxy for open time. A published study found differences in early skin formation between cellulose ethers adjusted to similar water-retention levels.[3] The practical implication is to measure both retention and delayed tile bonding.
Also distinguish two different time windows:
- Pot life: the usable working period of mixed adhesive in the container.
- Open time: the interval after spreading during which the adhesive can still achieve the specified bond when the tile is placed.
A mortar can remain workable in the bucket while its exposed surface no longer provides adequate tile contact.
For a closer look at these separate measurements, see water retention and open time in tile adhesive.
If HPMC trials are needed, compare a candidate grade at a defined dosage before running a separate dosage series. The same evaluation principle applies if the established formula uses MHEC.
5. Revalidate RDP in the Complete Adhesive System
RDP should be evaluated in the finished mortar made with the proposed cement. A polymer grade that performed well with the previous cement still needs confirmation in the revised system.
Include initial tensile adhesion and the conditioning regimes relevant to the product specification, such as water immersion, heat ageing and freeze–thaw exposure. Include transverse deformation where required by the intended classification or claim.
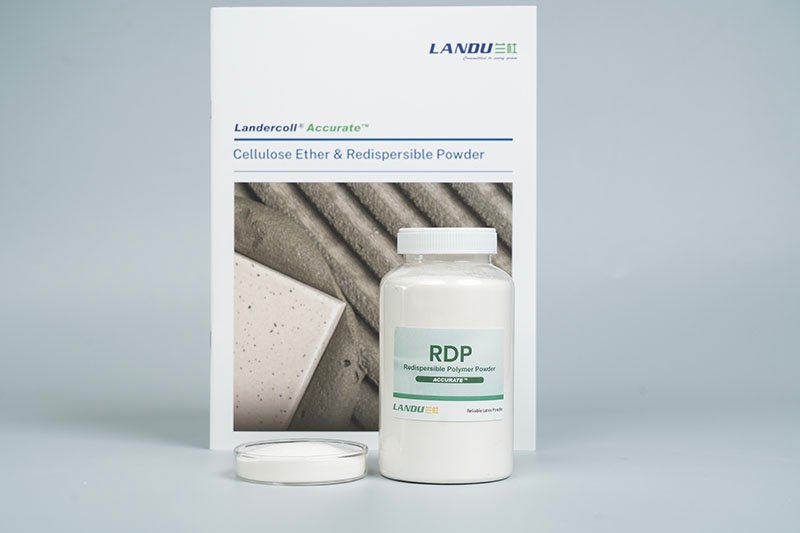
If standard-cured adhesion remains acceptable but water-conditioned adhesion falls, use the water-immersion adhesion failure guide to examine the failure pattern and comparison conditions.
For products requiring freeze–thaw validation, the RDP freeze–thaw test guide explains useful measurements and common comparison errors. Freeze–thaw durability after curing is a separate question from applying fresh adhesive below freezing.
EN 12004-1 addresses performance requirements and classification; EN 12004-2 describes test methods, including open time, slip, tensile adhesion and transverse deformation. Use the applicable editions and complete laboratory procedures.[4][5]
When a result changes, record the failure location as well as the strength value. Check tile contact, specimen preparation and conditioning before attributing the difference to RDP.
Increasing polymer dosage is not a diagnosis. First establish whether the changed result is associated with application behaviour, the hardened system or a testing inconsistency.
For grade comparisons, document the commercial powder dosage and available product information. Equal powder additions do not necessarily mean equal active polymer additions across different products.
6. Use a Small, Traceable Trial Matrix
The following is a proposed screening sequence, not a set of laboratory results.
H0 and R0 are the current HPMC and RDP grades. H1 and R1 are candidate grades. For the first grade-screening comparison, hold each additive’s commercial-product dosage constant and express it as a percentage of total dry-mix mass. Run dosage optimisation separately. This is an equal commercial-dose comparison, not proof of equal active-polymer content.
Swipe or use the arrow keys to view the complete table.
| Trial | Cement | HPMC | RDP | Purpose |
|---|---|---|---|---|
| A | Current | H0 | R0 | Establish the reference |
| B | Proposed | H0 | R0 | Identify the effect of changing cement |
| H | Proposed | H1 | R0 | Evaluate one HPMC grade change |
| P | Proposed | H0 | R1 | Evaluate one RDP grade change |
| HP, if justified | Proposed | H1 | R1 | Confirm the combined candidate package |
Only add H or P trials when the baseline results justify them. If B meets the requirements with stable performance, the existing additive package may remain suitable.
Keep water conditions explicit for every comparison. If dosage changes are investigated, run them as a separate series and record how the formula is balanced to maintain 100% dry mass without inadvertently changing the cement content.
Repeat promising results in independently prepared mixes. Several test specimens from one mix help assess that mix, but they do not demonstrate between-mix reproducibility.
If the purpose is to establish a cement-specific additive interaction, also test the candidate additive with the current cement. Without that comparison, an improvement may reflect a generally better additive choice rather than special compatibility with the proposed cement.
Keep one record for every independently prepared mix:
Swipe or use the arrow keys to view the complete table.
| Record field | Minimum useful detail |
|---|---|
| Materials and formula | Cement delivery/lot, HPMC/RDP grades and lots, complete dry-mix percentages |
| Water and preparation | Water addition basis, temperature, mixing, resting and remixing sequence |
| Fresh performance | Measurement method and elapsed time; consistency, retention, transfer and slip observations |
| Hardened performance | Test method, conditioning route, individual results, reported summary and failure location |
| Decision | Required target, reference comparison, deviations and the next trial or release decision |
If you are preparing samples for a supplier discussion, follow the tile adhesive sample-testing and formulation review process so the cement comparison and performance gap can be reproduced.
7. Interpret Results Before Choosing a Correction
Swipe or use the arrow keys to view the complete table.
| Observation | What to investigate next |
|---|---|
| Higher water demand or faster consistency loss | Confirm water conditions and mixing; compare HPMC performance and hydration-related behaviour |
| Acceptable bucket workability but poorer delayed tile bonding | Investigate exposed-surface behaviour, tile transfer and open time |
| Similar fresh behaviour but lower conditioned adhesion | Review the hardened system, RDP selection, conditioning and failure location |
| Both reference and candidate perform unusually poorly | Check common raw materials, preparation and test conditions before blaming the cement switch |
| One proposed-cement batch passes but later batches vary | Investigate incoming cement variation and repeat with representative deliveries |
| All required properties remain stable | Confirm reproducibility; an additive change may be unnecessary |
These observations guide the next experiment. None identifies a unique cause on its own.
For example, restoring workability with more water does not establish that the adhesive’s conditioned adhesion is unchanged. Likewise, improving one adhesion result does not confirm that open time, slip and deformation requirements are satisfied.
8. Set Release Criteria Before Production Transfer
Define acceptance criteria before selecting the preferred trial. Otherwise, the most convenient result can become the acceptance rule.
The release plan should cover:
- Required finished-product performance. Confirm the intended classification and declared application properties.
- Internal consistency targets. Establish acceptable variability using product history and laboratory repeatability. A single result just above a threshold gives limited evidence of production robustness.
- Representative cement deliveries. Choose the confirmation scope according to the size of the change, supplier history and observed variation.
- Production-scale verification. Confirm that industrial mixing and the proposed customer water range reproduce the laboratory outcome.
- Transition management. If old and new cement will mix in a silo, assess representative transition blends where relevant. Passing results at both endpoints do not establish every blend’s behaviour.
- Traceability and instructions. Record approved cement sources, formula revision, additive specifications, mixing instructions and incoming-control triggers.
For purchasing teams, compare the cost of the approved finished formula. A lower cement price may be offset by a revised additive package, extra testing or greater manufacturing variability.
A useful change-approval record should identify the tested cement lots, complete formula, water addition, methods, results, deviations and person responsible for release.

Frequently Asked Questions
Do we always need to increase HPMC after switching cement?
No. Test the unchanged formula first. If the intended fresh and hardened properties remain stable, the existing grade and dosage may remain appropriate.
Can two cements with the same strength class use the same tile adhesive formula?
They may, but strength class alone does not establish equivalence. Confirm application behaviour and the relevant finished-adhesive properties.
Can we replace CEM I with CEM II without changing HPMC or RDP?
Possibly, depending on the specific cements and formulation. Review the full cement designation and constituent information, then validate the complete adhesive. The cement family name alone cannot determine the required additive adjustment.
Is passing initial adhesion sufficient to approve the change?
No. The approval programme should include the conditioning regimes and application properties relevant to the product specification. Initial adhesion provides only part of that evidence.
Which additive should we change first: HPMC or RDP?
Let the observed performance gap guide the trial. Fresh-state changes may justify investigating the cellulose ether and water conditions first. A conditioned-adhesion gap may justify closer examination of the polymer–cement system. Keep the unchanged-formula control throughout the investigation.
Discuss Your Cement Change with LANDU
LANDU manufactures chemical additives for dry-mix mortar producers, including HPMC, MHEC and RDP.
To discuss suitable trial candidates, share a non-confidential summary of:
- The current and proposed cement designations.
- The target tile adhesive class and intended application.
- Current HPMC and RDP grades and dosages.
- Mixing-water addition and the properties that changed.
- Available comparative test results.
Request HPMC/RDP trial samples for your cement change
In the message field, summarise the cement change and the result you need to improve, and ask for the relevant technical data and trial-sample options. You can begin with a non-confidential summary; agree how to share detailed reports or physical samples during follow-up.
Candidate selection should lead to a measurable comparison in your own formulation. Approval of the finished adhesive remains subject to the required testing and production validation.
Technical References
- İnceoğlu, F. et al. Influence of cement with different calcium sulfate phases on cementitious tile adhesive mortars: Microstructure and performance aspects. International Journal of Adhesion and Adhesives, 104 (2021), 102744. Publisher record
- Petit, J.-Y. and Wirquin, E. Evaluation of various cellulose ethers performance in ceramic tile adhesive mortars. International Journal of Adhesion and Adhesives, 40 (2013), 202–209. Publisher record
- Neubauer, J. and Lebert, J. The influence of hydroxyalkyl methylcellulose on early skin formation in cement-based tile adhesive. ce/papers, 6(6) (2023), 1660–1665. Publisher record
- EN 12004-1:2017 — Requirements, assessment and verification of constancy of performance, classification and marking.
- EN 12004-2:2017 — Test methods.