HPMC Dosage in Tile Adhesive 0.2–0.5% for Open Time and Anti-Slip | Landercoll
Introduction:
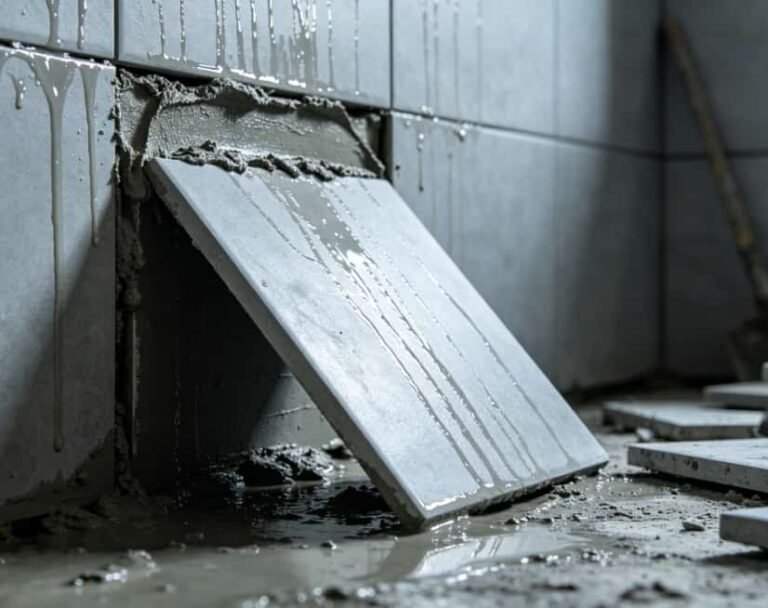
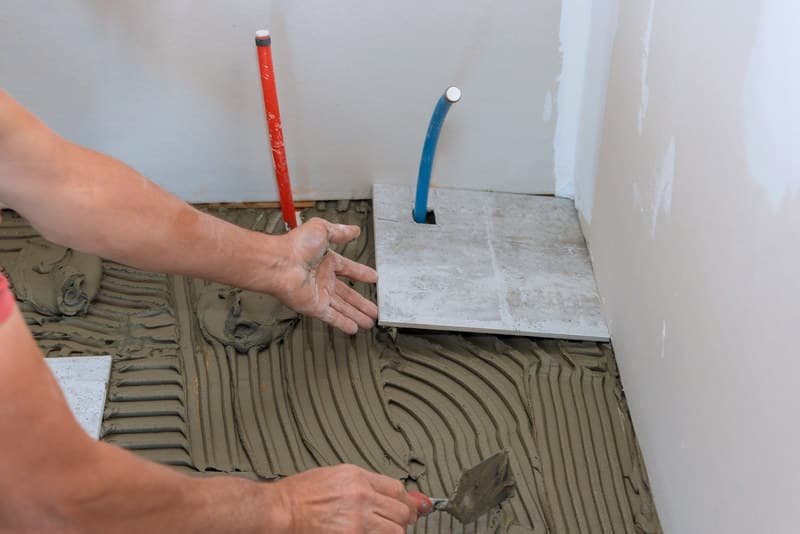
Anyone who formulates tile adhesives knows the drill. Large-format and porcelain tiles are everywhere now, and with them come two headaches: short open time – you mix the batch, spread it, and by the time you’re ready to set the tile, the adhesive’s already skinning over. And poor anti-slip – you get the tile on the wall, let go, and watch it slide down. Every formulator has been there.
HPMC fixes both. But here’s the thing: dosage matters. Too little, and you might as well not have added it. Too much, and your adhesive becomes a sticky mess that no tiler wants to work with.
In this guide, we’re sharing Landercell’s internal formulation data. We’ll focus on the 0.2–0.5% dosage range – what happens at the low end, what happens at the high end, and where the sweet spot is for C1, C2, and T-type adhesives. No fluff. Just data and practical takeaways.
2. How HPMC Works in Tile Adhesive?
2.1 Water Retention – The Key to Open Time
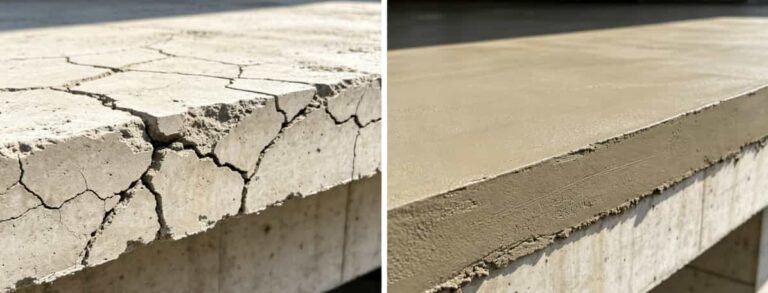
Here’s what happens when you spread tile adhesive on a porous substrate like concrete or cement board. The substrate pulls water out of the adhesive. Fast. If you lose too much water too quickly, the cement doesn’t hydrate properly, and the adhesive film starts skinning over within minutes. That’s short open time.
HPMC solves this by holding onto water. The cellulose ether molecules form a flexible film that traps water in the mix, releasing it slowly over time. This gives tilers a longer working window – more time to spread, more time to adjust tiles.
The higher the HPMC dosage (within reason), the better the water retention. But there’s a catch. More on that in section 3.
2.2 Yield Stress – The Key to Anti-Slip
Anti-slip is about something called yield stress. Think of it as the force you need to get the adhesive to start flowing. Before you apply pressure, a high-yield-stress adhesive stays put. After you push the tile in, it doesn’t creep or slide.
HPMC increases yield stress through its thickening effect. The polymer chains entangle and create internal resistance. The result? You can press a tile into the adhesive bed, let go, and it stays where you put it. No sliding down the wall.
But here’s the trade-off. High yield stress is good for anti-slip, but if it’s too high, the adhesive becomes hard to spread. Tilers will complain it’s “too heavy” or “fights back.” That’s why dosage balance matters.
2.3 The Balancing Act
Open time needs water retention. Anti-slip needs yield stress. HPMC delivers both, but not independently. The same polymer network that holds water also creates internal friction.
| Performance target | What HPMC provides | What happens if dosage is too low | What happens if dosage is too high |
|---|---|---|---|
| Open time | Water retention | Fast drying, short working window | Diminishing returns, possible over-stabilization |
| Anti-slip | Yield stress (thickening) | Tiles slide down | Adhesive too stiff, hard to spread |
| Workability | Lubrication + consistency | Rough, short texture | Sticky, “fighting” feel |
The goal is to find the dosage where both properties hit their sweet spot. For most C1, C2, and T-type formulations, that’s in the 0.2–0.5% range. Let’s look at the data.
3. HPMC Dosage vs. Performance – The Data
Theory is fine, but formulators want numbers. Here’s what we’ve seen in Landercell’s lab across multiple C1, C2, and T-type tile adhesive formulations.
- Why HPMC is Indispensable for High-Performance Tile Adhesive?
3.1 Performance Comparison by Dosage Range
The table below shows how different HPMC addition rates affect open time, anti-slip, workability, and bonding strength. Tests followed EN 1346 (open time) and EN 1308 (anti-slip) methods.
| HPMC Dosage (kg/ton) | HPMC Dosage (%) | Open Time (minutes) | Anti-Slip (mm) | Workability | Bonding Strength | Best For |
|---|---|---|---|---|---|---|
| 1.5 – 2.0 | 0.15 – 0.20% | 10 – 15 | ≥ 1.0 (slides) | Runny, loose | Moderate | Small tiles, mosaics |
| 2.0 – 2.5 | 0.20 – 0.25% | 15 – 20 | 0.5 – 1.0 | Fairly smooth | Good | Standard wall tiles (300x600mm) |
| 2.5 – 3.5 | 0.25 – 0.35% | 20 – 30 | ≤ 0.5 | Smooth, not sticky | High | Recommended range for most C1/C2/T |
| 3.5 – 4.5 | 0.35 – 0.45% | 30 – 40 | 0 | Thick, heavy | High but diminishing | Large-format / heavy tiles |
| > 5.0 | > 0.50% | 40+ | 0 | Overly sticky, air bubbles | Drops (air voids) | Not recommended |
3.2 What the Data Tells Us
The sweet spot is 2.5 – 3.5 kg per ton (0.25 – 0.35%).
Three observations from the data:
1. Open time increases with dosage, but with diminishing returns.
Going from 1.5 to 2.5 kg/ton adds about 5–10 minutes of open time. Going from 3.5 to 4.5 kg/ton adds less than 5 minutes. At some point, more HPMC doesn’t buy you much extra working time.
2. Anti-slip improves sharply up to 3.5 kg/ton, then plateaus.
Below 2.0 kg/ton, tiles slide. Between 2.5 and 3.5 kg/ton, anti-slip is solid (≤0.5mm movement). Above 3.5 kg/ton, you get zero movement – but the adhesive becomes heavy.
3. Workability is the limiting factor at high dosages.
Above 4.0 kg/ton, tilers will complain. The mix feels sticky and “fights back.” At >5.0 kg/ton, you also get air bubbles trapped during mixing, which can actually lower bonding strength despite the higher HPMC content.
3.3 A Note on C1, C2, and T-Type Requirements
Different adhesive grades need different balance points:
| Adhesive Grade | Priority | Recommended HPMC Dosage |
|---|---|---|
| C1 (standard) | Basic open time + anti-slip | 2.5 – 3.0 kg/ton |
| C2 (enhanced) | Higher bonding strength + longer open time | 3.0 – 3.5 kg/ton |
| T-type (anti-slip priority) | Maximum sag resistance | 3.0 – 3.5 kg/ton + starch ether |
| C2TE / S1/S2 (flexible + extended) | Long open time + flexibility | 3.0 – 3.5 kg/ton with胶粉 adjustment |
If you’re formulating a C2TE or S1/S2 product, you’ll likely need the higher end of the range (3.0–3.5 kg/ton) plus other additives. For standard C1, stick to 2.5–3.0 kg/ton.

4. Other Factors That Affect Open Time
HPMC dosage is the biggest lever, but it’s not the only one. Even with the right HPMC level, you can still end up with short open time if other variables are off. Here’s what else to watch.
- 4.1 HPMC Viscosity Grade
Not all HPMC is the same. Viscosity grade matters.
Lower viscosity HPMC (like 20,000 – 40,000 mPa·s) dissolves faster and wets out more easily. But it also loses water more quickly. Higher viscosity grades (60,000 – 80,000 mPa·s) hold water longer – up to a point. Go too high, and the polymer doesn’t fully hydrate in time. You end up with clumps, not a smooth adhesive.
For most tile adhesives, 40,000 – 60,000 mPa·s is the practical range. Above that, you’re paying for viscosity you won’t fully use.
- 4.2 Job Site Conditions
This is where a lot of field complaints come from. The same adhesive behaves differently depending on where and when it’s used.
| Condition | Effect on Open Time | What to Do |
|---|---|---|
| High temperature (>30°C / 86°F) | Accelerates water evaporation. Open time drops by 30-50% | Increase HPMC dosage by 0.1-0.2%, or switch to higher viscosity grade |
| Low humidity (dry air) | Same as high heat. Water leaves faster | Same as above |
| Strong wind | Speeds surface drying. Adhesive skins over quickly | Block wind if possible, or add 0.1-0.2% more HPMC |
| Porous substrate (brick, aerated concrete) | Sucks water out of the adhesive from below | Prime the substrate first. Or increase HPMC dosage |
| Low temperature (<10°C / 50°F) | Slows cement hydration. Open time extends, but strength develops slower | No change for open time. But warn about slower strength gain |
Bottom line: What works on a 20°C lab bench might fail on a 35°C jobsite in summer. If you supply adhesives for different climates, build in a buffer or offer seasonal formulation adjustments.
- 4.3 Other Additives
Some additives help open time. Others hurt it.
Starch ether – Improves anti-slip, but can reduce open time slightly if overdosed. Keep it under 0.5 kg/ton.
Retarders (citric acid, tartaric acid, etc.) – Slow down cement setting, which effectively extends open time. But they don’t replace HPMC’s water retention. Use both, not either/or.
High-dose superplasticizers – Can cause segregation and bleeding, which leads to uneven drying and shorter effective open time. Adjust HPMC upward if you’re using strong water reducers.
Cement type – High-alumina cement behaves differently than Portland. Test your open time with each cement blend. Don’t assume one dosage fits all.
- 4.4 Quick Troubleshooting
If your open time is too short, check these in order:
HPMC dosage – Are you below 2.0 kg/ton? Bump it up.
HPMC quality – Cheap HPMC with poor substitution uniformity gives inconsistent water retention. Lab test vs. field performance might not match.
Jobsite conditions – Hot, dry, windy, or porous substrate? Adjust for the environment.
Mixing procedure – Under-mixing leaves HPMC not fully hydrated. Over-mixing introduces air. Both hurt open time.
Other additives – Any recent changes? Test with and without.
Most open time problems trace back to one of these five. Fix the root cause, not just the symptom.
5. Other Factors That Affect Anti-Slip Performance
HPMC gives you the base level of anti-slip. But if you’re formulating for large-format tiles, heavy stone, or vertical applications where sagging is a deal-breaker, you’ll need more than just HPMC. Here’s what else matters.
We touched on this earlier. For anti-slip, medium-to-high viscosity HPMC (40,000 – 60,000 mPa·s) works best.
Why? Lower viscosity grades don’t build enough yield stress. The adhesive flows too easily, and tiles slide. Higher viscosity grades (80,000+ mPa·s) build plenty of yield stress, but they also make the mix heavy and hard to spread. You get anti-slip at the cost of workability.
The sweet spot for most tile adhesives is 40,000 – 60,000 mPa·s. Within that range, you get solid anti-slip without turning the adhesive into a sticky paste.
If you need maximum sag resistance without cranking up HPMC to 4.0+ kg/ton, add starch ether.
Starch ether works differently than HPMC. It increases yield stress without significantly increasing viscosity. Translation: Better anti-slip without making the mix sticky.
Typical addition rate: 0.2 – 0.5 kg/ton.
| HPMC Dosage | Starch Ether | Anti-Slip Result | Workability |
|---|---|---|---|
| 2.5 kg/ton | None | Moderate (0.5-1.0mm slide) | Smooth |
| 2.5 kg/ton | 0.3 kg/ton | Good (≤0.5mm) | Still smooth |
| 3.5 kg/ton | None | Good (≤0.5mm) | Slightly heavy |
| 3.5 kg/ton | 0.3 kg/ton | Excellent (0mm) | Heavy |
The takeaway: If you want C2T or T-type performance, use both. HPMC alone can get you there, but you’ll need higher HPMC dosage and you’ll lose workability. HPMC + starch ether gets you there cleaner.
One warning: Don’t overdo starch ether. Above 0.6-0.7 kg/ton, open time starts to drop. And the mix can become “short” – it tears instead of spreading smoothly.
This one surprises a lot of formulators. The sand you use affects anti-slip.
Fine sand (0.1 – 0.3 mm) creates a smooth, dense mix. But it also reduces internal friction. Tiles slide more easily.
Coarser sand (0.3 – 0.6 mm) adds mechanical interlock. The particles create resistance. That resistance helps hold tiles in place.
| Sand Gradation | Anti-Slip Effect | Workability |
|---|---|---|
| Mostly fine (<0.3mm) | Poor – tiles slide | Smooth, creamy |
| Balanced (0.1-0.6mm blend) | Good | Standard |
| Coarser (>0.6mm) | Better anti-slip | Rougher texture |
You don’t need to switch to coarse sand entirely. But if you’re fighting anti-slip issues and you’ve already adjusted HPMC and starch ether, take a look at your sand gradation. A small shift toward coarser particles can make a measurable difference.
This sounds obvious, but it’s worth saying: More water thins out the adhesive. Thinner adhesive has lower yield stress. Lower yield stress means worse anti-slip.
Some tilers add water on site to make the mix easier to spread. That’s a problem. Every liter of extra water cuts anti-slip performance.
What to do: Specify a tight water range on your technical data sheet. For C2T products, consider adding a water-resistant or anti-slip additive that maintains performance even at higher water content. Or train your distributors to explain why adding water is a bad idea.
This isn’t about the chemistry, but it’s where anti-slip fails in the field.
Notching direction matters. Adhesive applied with horizontal notches has different sag resistance than vertical notches. Standard practice is to notch vertically on walls – it gives better support.
Bed thickness matters too. Thinner beds (3-4mm) hold tiles better than thick, loose beds (8-10mm). If the tiler is spreading too thick, the weight of the tile will push through the adhesive and cause sliding.
You can’t control how every tiler works. But you can note this in your application guide. It saves you troubleshooting calls later.
If tiles are sliding down the wall, check in this order:
HPMC dosage – Below 2.5 kg/ton? Go higher.
HPMC viscosity – Using a 20,000 mPa·s grade? Switch to 40,000-60,000.
Starch ether – Added any? If not, try 0.2-0.3 kg/ton.
Water content – Mix too wet? Reduce water or tighten spec.
Sand gradation – All fine sand? Blend in some coarser particles.
Application – Thick bed? Wrong notch direction? Field issue, not formula.
6. Practical Advice – How to Find the Optimal HPMC Dosage
Theory and data are useful. But every formulation is different. Your cement, your sand, your other additives, your target price point – they all shift the sweet spot.
Here’s a practical process to find the right HPMC dosage for your specific tile adhesive.
6.1 Start Here: Your Baseline
Before you run any tests, get clear on two things:
1. What grade are you targeting?
- C1 standard → Start at 2.5 kg/ton
- C2 enhanced → Start at 3.0 kg/ton
- T-type (anti-slip priority) → Start at 3.0 kg/ton, plan to add starch ether
- C2TE or S1/S2 flexible → Start at 3.0 – 3.5 kg/ton
2. What’s your substrate and tile type?
- Porous substrate (brick, aerated concrete) → You may need higher HPMC
- Non-porous substrate (glazed tile, glass) → Standard range works
- Large-format tiles (>600x600mm) → Lean toward higher end
- Small tiles (<300x300mm) → Lower end is fine
- Write these down. They’ll guide your test plan.
6.2 Step-by-Step Test Plan
Step 1: Pick three dosage points
Don’t test just one. Don’t test ten. Three is the right number.
| Test Point | Dosage | Purpose |
|---|---|---|
| Low | Starting point minus 0.5 kg/ton | See what “too low” looks like |
| Mid | Your starting point | Your target baseline |
| High | Starting point plus 0.5 kg/ton | See what “too high” looks like |
Example for a C2 formulation: Test 2.5, 3.0, and 3.5 kg/ton.
Step 2: Make small batches
Mix 2-3 kg of dry mortar per dosage. Use your standard cement, sand, and other additives. Change only the HPMC dosage.
Step 3: Run the tests
Test these three properties in order:
Open time (EN 1346 or JC/T 547)
- Spread adhesive on substrate
- Place tiles at 5, 10, 15, 20, 25, 30 minutes
- Check adhesion at each interval
- Record the last time with good transfer
Anti-slip (EN 1308 or JC/T 547)
- Spread adhesive with notched trowel
- Place tile with 5kg weight on top
- Measure how far it slides down
- ≤0.5mm is good. 0mm is excellent.
Workability (hands-on, not a standard test – but critical)
- Mix the adhesive. Feel the resistance.
- Spread it. Does it flow or fight back?
- Press a tile in. Does it feel right?
- Rate it: Too loose / Just right / Too sticky
Step 4: Compare the data
Lay out your results like this:
| Dosage | Open Time | Anti-Slip | Workability | Verdict |
|---|---|---|---|---|
| 2.5 kg/ton | 18 min | 0.8mm slide | Smooth | Acceptable for C1 |
| 3.0 kg/ton | 24 min | 0.3mm slide | Smooth | Best balance |
| 3.5 kg/ton | 28 min | 0mm slide | Slightly heavy | Good for C2/T |
Step 5: Pick your winner
Choose the dosage that gives you acceptable performance on all three metrics – not the maximum on any single one.
If open time is short but anti-slip is fine, go higher.
If workability is poor but anti-slip is great, go lower.
If both are borderline, adjust something else (viscosity grade, starch ether, sand gradation).
6.3 Common Pitfalls to Avoid
Testing only in perfect lab conditions.
Your adhesive won’t be used at 23°C and 50% humidity. Run a field test on a hot, dry day. You’ll learn more in one afternoon than a week in the lab.
Chasing maximum numbers.
You don’t need 45 minutes of open time or 0mm of slide. You need reliable performance at a reasonable cost. The “good enough” point is usually the right business choice.
Ignoring workability.
Tilers won’t read your technical data sheet. They’ll spread the adhesive and decide if it’s good or garbage. If they hate working with it, they’ll switch brands. Workability is not optional.
Changing multiple variables at once.
Test one change at a time. HPMC dosage this week. Starch ether next week. If you change three things and performance improves, you won’t know which change mattered.
Using the same dosage for every substrate and tile.
A formula that works on concrete block might fail on waterproof membrane. A dosage for 300x300mm tiles might be overkill for mosaics. Build a family of formulations, not one magic number.
6.4 A Note on Landercell HPMC
Every HPMC brand behaves differently. The data in this guide comes from Landercell’s lab tests. If you’re using another brand, expect different results. Substitution uniformity, viscosity consistency, and additive treatments all vary by manufacturer.
If you want to test Landercell HPMC in your formulation, contact us for a free sample. Run the same step-by-step process above. Compare the numbers. Then decide.
7. Conclusion & Next Steps
- What You Need to Remember
The optimal HPMC dosage for most C1, C2, and T-type tile adhesives is 0.25–0.35% (2.5–3.5 kg per ton of dry mix).
- Below 2.0 kg/ton – Open time is short. Tiles slide. Don’t expect reliable performance.
- 2.5–3.5 kg/ton – The sweet spot. Solid open time (20–30 minutes), good anti-slip (≤0.5mm), workable mix.
- Above 4.0 kg/ton – Diminishing returns. Open time doesn’t improve much. Workability suffers. Air bubbles become a problem.
- Above 5.0 kg/ton – Don’t go here. You’re paying more for worse performance.
- One more thing: HPMC dosage isn’t the only variable. Viscosity grade, starch ether, sand gradation, and jobsite conditions all matter. If you’re chasing performance, look at the whole system – not just the HPMC bag.
- A Quick Word on Quality
Not all HPMC is the same. We’ve seen plenty of cases where a formulator copied a recipe from one brand to another and got completely different results. Substitution uniformity, hydration speed, and batch-to-batch consistency vary widely across manufacturers.
If your adhesive performance shifts from batch to batch, check your HPMC supplier first.
- If you don't know how to choose?
Take the test plan from Section 6. Run it with your current HPMC. See where you stand. Then decide if you want to try Landercell HPMC alongside your existing supplier for a direct comparison.
If you’re just gathering information:
Bookmark this guide. When you’re ready to test or switch suppliers, come back to Section 6. The process works regardless of which brand you end up with.
If you want to test Landercell HPMC:
We’ll send you a free sample. Run it through the same test plan. Compare open time, anti-slip, workability, and cost. No pressure. Just data.
7. Related Resources
If this guide was useful, you might also want to read:
How to Choose the Right HPMC Viscosity for Tile Adhesive, Putty, and Gypsum Plaster (coming soon)
Starch Ether vs. HPMC: Which One Improves Anti-Slip Better? (coming soon)
Why Your Tile Adhesive Open Time Changes in Summer – And How to Fix It (coming soon)
Or ask us a question directly. We reply within 24 hours.
8. FAQ – Frequently Asked Questions
Q1: What is the ideal HPMC dosage for tile adhesive?
A: For most C1, C2, and T-type tile adhesives, the ideal HPMC dosage is 2.5–3.5 kg per ton of dry mix (0.25–0.35%). This range delivers 20–30 minutes of open time, ≤0.5mm anti-slip, and good workability. Below 2.0 kg/ton, performance drops off. Above 4.0 kg/ton, you get diminishing returns and workability suffers.
Q2: What happens if I use too much HPMC in tile adhesive?
A: Above 4.0 kg/ton, the adhesive becomes overly sticky and hard to spread. Tilers will complain it “fights back.” Above 5.0 kg/ton, you also get air bubbles trapped during mixing, which can actually lower bonding strength. More HPMC isn’t always better. The sweet spot is 2.5–3.5 kg/ton.
Q3: What's the difference between HPMC and starch ether for anti-slip?
A: HPMC builds yield stress through thickening – it makes the whole mix heavier. Starch ether increases yield stress without significantly increasing viscosity. For maximum anti-slip, use both: HPMC at 2.5–3.0 kg/ton plus starch ether at 0.2–0.5 kg/ton. This gives you excellent sag resistance without making the adhesive sticky.
Q4: Why does my tile adhesive open time vary between summer and winter?
A: Temperature affects HPMC performance. HPMC viscosity drops as temperature rises. On a hot day (above 30°C / 86°F), open time can shorten by 30–50% compared to lab conditions at 23°C. Solution: Increase HPMC dosage by 0.1–0.2% in summer, or switch to a modified HPMC with higher gel temperature. See Section 4.2 for details.
Q5: How do I test open time and anti-slip for tile adhesive?
A: Follow EN 1346 for open time and EN 1308 for anti-slip (or JC/T 547 for Chinese standard). For open time: Spread adhesive, place tiles at different time intervals (5, 10, 15, 20, 25, 30 minutes), and check adhesion. For anti-slip: Spread with notched trowel, place a tile with 5kg weight on top, and measure how far it slides down. ≤0.5mm is good.
Q6: Can I use the same HPMC dosage for all tile adhesive grades?
A: No. Different grades need different targets:
| Grade | Priority | Recommended HPMC Dosage |
|---|---|---|
| C1 (standard) | Basic performance | 2.5–3.0 kg/ton |
| C2 (enhanced) | Higher strength + longer open time | 3.0–3.5 kg/ton |
| T-type (anti-slip) | Maximum sag resistance | 3.0–3.5 kg/ton + starch ether |
| C2TE / S1/S2 | Flexible + extended open time | 3.0–3.5 kg/ton + polymer powder adjustment |
Q7: How does HPMC viscosity grade affect tile adhesive performance?
A: Lower viscosity HPMC (20,000–40,000 mPa·s) dissolves faster but holds less water. Higher viscosity (60,000–80,000 mPa·s) holds more water but can be slow to hydrate. For most tile adhesives, 40,000–60,000 mPa·s is the practical range. It gives good water retention for open time and enough yield stress for anti-slip without killing workability.
Q8: Why does my tile adhesive perform well in the lab but fail on site?
A: Lab conditions (23°C, 50% humidity, controlled substrate) don’t match real jobsites. Common field issues:
- High temperature – Water evaporates faster, open time drops
- Wind – Surface dries quickly, adhesive skins over
- Porous substrate – Sucks water out of the adhesive
- Too much water added on site – Thins the mix, kills anti-slip
Solution: Build in a buffer. Test your formula on a hot, dry day. See Section 4.2 and 5.4.
Q9: How do I choose between HPMC and HEMC for tile adhesive?
A: HPMC (hydroxypropyl methylcellulose) and HEMC (hydroxyethyl methylcellulose) are both used in tile adhesives. HEMC has slightly better water retention but lower gel temperature (around 60-65°C vs. 70-75°C for HPMC). For most climates, HPMC is the standard choice. For hot-climate formulations, HPMC with higher gel temperature or modified HPMC is recommended.
Q10: Can I get a free sample of Landercell HPMC for testing?
A: Yes. Contact us with your target grade (C1, C2, T-type, or C2TE) and typical batch size. We’ll recommend a starting viscosity and dosage based on our lab data. Run the test plan from Section 6. Compare the numbers. No pressure – just data.